To learn how to draw a cat, start by sketching a circle for the head and adding two small triangles for the ears. Then, draw a curved line for the body and add four legs with paws.
Next, draw the eyes, nose, and mouth, and add whiskers on the sides of the face. Finally, add details like fur and markings to complete the drawing. Drawing a cat can be a fun and creative activity for both children and adults.
Whether you are a beginner or an experienced artist, capturing the essence of a cat’s features can be challenging but rewarding. In this tutorial, we will provide step-by-step instructions on how to draw a cat in a simple and easy-to-follow manner. So grab your pencil and paper, and let’s get started on this artistic journey of capturing the beauty and grace of our feline friends.
How to Draw a Masterpiece: Embracing Your Artistic Journey
Finding Your Inspiration
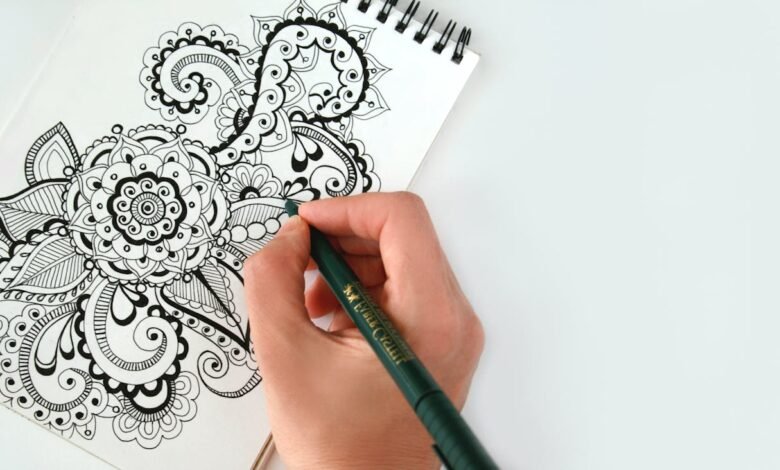
Before you start drawing, it’s essential to find your inspiration on how to draw a masterpiece. Inspiration can come from anywhere, and it’s different for everyone. You can find inspiration in nature, people, animals, or everyday objects. Take a walk outside or look through a magazine or book for ideas. Once you find your inspiration, you can start to sketch out your ideas and bring them to life.
The Importance Of Practice
Like any skill, drawing requires practice on how to draw a masterpiece. The more you draw, the better you’ll get. Set aside some time each day to practice your drawing skills. Start with simple sketches and gradually work your way up to more complex drawings. Don’t be afraid to make mistakes. Mistakes are a natural part of the learning process, and they can help you improve your skills.
Try to practice different techniques and styles to find what works best for you. You can also take a drawing class or watch tutorials online to learn new skills and techniques. Remember, the key to improving your drawing skills is to practice consistently.
Drawing is an excellent way to express your creativity and explore your artistic talents on how to draw a masterpiece. By finding your inspiration, practicing consistently, and exploring new techniques and styles, you can improve your drawing skills and create beautiful works of art. Remember, the most important thing is to enjoy the journey and have fun!
Gathering Your Art Supplies
Before starting to draw on how to draw a masterpiece, it’s essential to gather the right art supplies. This step sets the foundation for creating your masterpiece.
Choosing The Right Pencils
- Different pencils offer varying line thicknesses and shading effects.
- Graphite pencils are versatile for sketching and shading.
- Colored pencils add vibrancy and depth to your drawings.
Selecting Paper
- Quality paper enhances the overall look and longevity of your artwork.
- Sketch paper is ideal for practice and initial sketches.
- Mixed-media paper works well with various drawing techniques.
Additional Tools
- Eraser: Correct mistakes and refine details.
- Blending stumps: Blend and soften pencil strokes for a smoother finish.
- Ruler: Ensure straight lines and precise measurements in your drawing.
Understanding Basic Drawing Techniques
Shading And Texture
Shading and texture play a crucial role on how to draw a masterpiece in adding depth and dimension to your drawings. Shading refers to the technique of adding value to different areas of your artwork to create a three-dimensional effect. By varying the intensity of your pencil strokes, you can create highlights, mid-tones, and shadows that give your drawing a sense of volume.
Texture, on the other hand, involves replicating the surface quality of different objects within your drawing on how to draw a masterpiece. Whether it’s the roughness of tree bark or the smoothness of a glass surface, understanding how to depict various textures can make your drawings more realistic and engaging. Experimenting with different shading techniques, such as cross-hatching or stippling, can help you achieve the desired texture in your artwork.
Perspective And Depth
Perspective is a fundamental concept in drawing on how to draw a masterpiece that allows you to create the illusion of depth and distance on a two-dimensional surface. By understanding perspective, you can accurately depict objects at different distances and angles, giving your drawings a sense of realism. One-point perspective, two-point perspective, and three-point perspective are commonly used techniques to create depth and spatial relationships in your artwork.
Depth, on the other hand, refers to the perception of distance between objects in a drawing. By using techniques such as overlapping, size variation, and atmospheric perspective, you can create a sense of depth in your artwork. This helps to make your drawings more dynamic and captivating to the viewer.
By mastering shading and texture, as well as perspective and depth on how to draw a masterpiece, you can take your drawing skills to the next level. Practice these techniques regularly, experiment with different styles, and observe the world around you for inspiration. With time and dedication, you will see your artwork evolve and your drawings become more engaging and visually striking.
Sketching Your Masterpiece
When it comes to drawing, sketching on how to draw a masterpiece is an essential part of the process. Sketching allows you to get your ideas down on paper and make adjustments before finalizing your drawing. In this post, we will focus on the subheading ‘Sketching Your Masterpiece’ and explore the steps involved in sketching your drawing.
Starting With Basic Shapes
The first step in sketching on how to draw a masterpiece your drawing is to start with basic shapes. This step involves breaking down your subject into simple shapes such as circles, squares, and triangles. For instance, if you are drawing a cat, you can begin with a circle for the head and ovals for the body and legs.
The purpose of starting with basic shapes is to establish the proportions and placement of your subject on the page. This step is especially helpful if you struggle with drawing accurate proportions.
Refining Your Sketch
Once you have established the basic shapes, the next step is to refine your sketch. This step involves adding more details to your drawing and making adjustments to the proportions.
Refining your sketch can involve adding more lines to define the contours of your subject, erasing unnecessary lines, and adjusting the size and placement of the shapes you drew in the previous step.
It is important to remember that sketching is a process and it is okay to make mistakes. Keep refining your sketch until you are satisfied with the overall composition and proportions.
Final Thoughts
Sketching on how to draw a masterpiece is an important step in the drawing process and can help you create a successful final drawing. Starting with basic shapes and refining your sketch are two essential steps in the sketching process. Remember to take your time and make adjustments as needed until you are happy with your sketch.
Bringing Your Drawing To Life
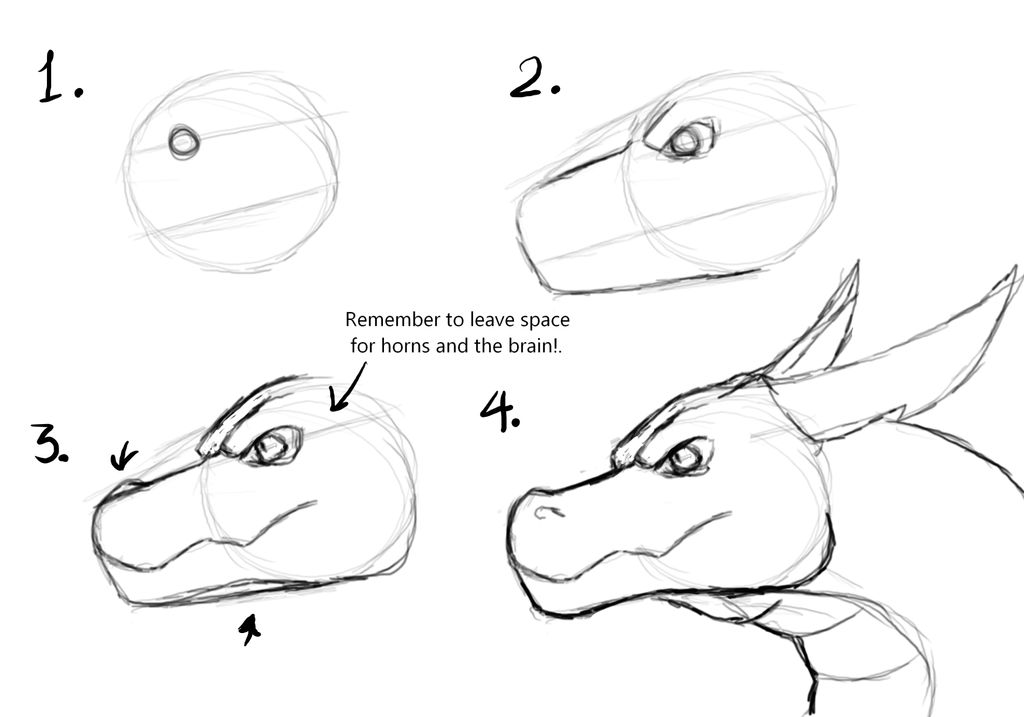
Once you have sketched the outline and added the basic shapes on how to draw a masterpiece, it’s time to bring your drawing to life by adding details, contrast, and highlights. This is where you can make your drawing stand out and capture the viewer’s attention.
Detailing Techniques
Detailing is crucial in giving depth and realism to your drawing. Use fine lines to add intricate details to your subject. Cross-hatching and stippling are effective techniques for creating texture and depth, especially in areas such as fur, foliage, or fabric. Paying attention to small details can elevate your drawing from good to exceptional.
Creating Contrast And Highlights
Contrast and highlights are essential for adding dimension and visual interest to your drawing. Utilize varying line weights to create contrast between light and dark areas. Shading and blending techniques help in adding depth and volume to your subject. Highlights should be strategically placed to mimic the play of light on the object, making it appear more realistic and engaging.
Credit: www.deviantart.com
Adding The Final Touches
Now that you have worked on the basic structure and details of your drawing on how to draw a masterpiece, it’s time to add the final touches that will bring your artwork to life. This is the stage where you refine your drawing and make any necessary adjustments to ensure it looks polished and complete. In this section, we will explore two important steps: reviewing your work and making final adjustments.
Reviewing Your Work
Before making any final adjustments on how to draw a masterpiece, it’s crucial to take a step back and evaluate your drawing as a whole. This allows you to identify any areas that may need improvement or further refinement. Here are a few tips to guide you through the reviewing process:
- Assess the proportions: Check if the different elements of your drawing are proportionate to each other. Pay attention to the size and placement of objects or characters to ensure they look balanced and realistic.
- Check the perspective: Confirm that the perspective in your drawing is consistent throughout. This means that objects should appear smaller as they recede into the distance.
- Inspect the details: Zoom in on the finer details of your drawing, such as facial features or textures. Make sure they are accurately depicted and add depth and dimension to your artwork.
Making Final Adjustments
Once you have reviewed your work, it’s time to make any necessary final adjustments to enhance the overall look and feel of your drawing. Consider the following steps:
- Refine the lines: Go over the lines of your drawing and make them cleaner and more defined. Use bolder strokes for emphasis and lighter strokes for subtlety.
- Enhance shading and highlights: Add shading to create depth and dimension in your drawing. Use hatching or cross-hatching techniques to add texture. Add highlights to areas that catch the light to make them stand out.
- Add final details: Pay attention to the smaller details that can make a big difference. This could include adding texture to clothing, adding reflections to shiny surfaces, or refining facial expressions.
Remember, the final touches you add to your drawing can make all the difference in creating a visually captivating piece of artwork. Take your time and enjoy the process of perfecting your drawing until you are satisfied with the end result.
Protecting And Presenting Your Artwork
When it comes to protecting and presenting your artwork, there are key considerations to keep in mind. One crucial aspect is choosing the right frame to enhance the visual appeal of your drawing while also ensuring its longevity. In addition, following preservation tips can help maintain the quality of your artwork for years to come.
Choosing The Right Frame
Opt for a frame that complements your drawing without overpowering it. Consider factors like color, material, and size to showcase your artwork effectively.
Preservation Tips
- Store your artwork in a cool, dry place away from direct sunlight to prevent fading.
- Use acid-free materials for matting and framing to avoid yellowing or staining.
- Handle your artwork with clean hands or wear gloves to prevent oil transfer.
- Avoid hanging artwork in high humidity areas to prevent moisture damage.
Credit: m.youtube.com
Continuing Your Artistic Development
As you progress in your art journey, it is essential to focus on continuing your artistic development to enhance your skills further.
Learning From Other Artists
Observe other artists’ techniques to gain inspiration and insights for your own work.
Experimenting With New Techniques
Push your boundaries by experimenting with new techniques to grow as an artist.

Frequently Asked Questions
How To Start Drawing?
To start drawing on how to draw a masterpiece, gather your materials, choose a subject, and practice basic shapes and lines. Then, gradually move on to more complex subjects as you build your skills and confidence.
What Are The Essential Drawing Materials?
Essential drawing materials include pencils, erasers, paper, and a sharpener. Additionally, consider using drawing pens, markers, or charcoal for different effects and styles.
How To Improve Drawing Skills?
To improve your drawing skills, practice regularly, study different techniques and styles, and seek feedback from other artists. Consider taking classes or watching tutorials to learn new methods and approaches.
Conclusion
Learning how to draw a [subject] can be a rewarding and enjoyable experience for anyone. By following the simple steps and practicing regularly, you can improve your drawing skills and unleash your creativity. Remember to be patient with yourself and have fun with the process.
With dedication and practice, you can master the art of drawing [subject].