To draw Spider-Man, start by sketching the basic outline of his body using simple shapes. Then, add details such as his iconic mask, web pattern, and muscular physique.
Use bold lines and shading to give the drawing depth and dimension. Finally, color the drawing using vibrant shades of red and blue to bring Spider-Man to life. Happy drawing! Drawing Spider-Man can be a fun and creative activity for fans of the friendly neighborhood superhero.
Whether you’re an aspiring artist or just looking for a way to pass the time, learning how to draw Spider-Man can be an exciting endeavor. We will provide you with step-by-step instructions on how to draw Spider-Man, allowing you to capture his dynamic and agile essence on paper. So, grab your pencils and get ready to unleash your artistic skills as we delve into the world of Spider-Man drawing.

Credit: m.youtube.com
Introduction To Drawing Spider-man
Spider-Man is an iconic superhero loved by many. Learning to draw him can be exciting and rewarding.
Iconic Superhero’s Appeal
Spider-Man’s appeal lies in his unique costume and dynamic poses.
Gearing Up With The Right Tools
When drawing Spider-Man, ensure you have the following tools:
- Pencils: graphite pencils for sketching
- Paper: sketch paper for initial drawings
- Eraser: kneaded eraser for corrections
- Ink Pen: fineliner for outlining
- Coloring Materials: markers or colored pencils for adding color
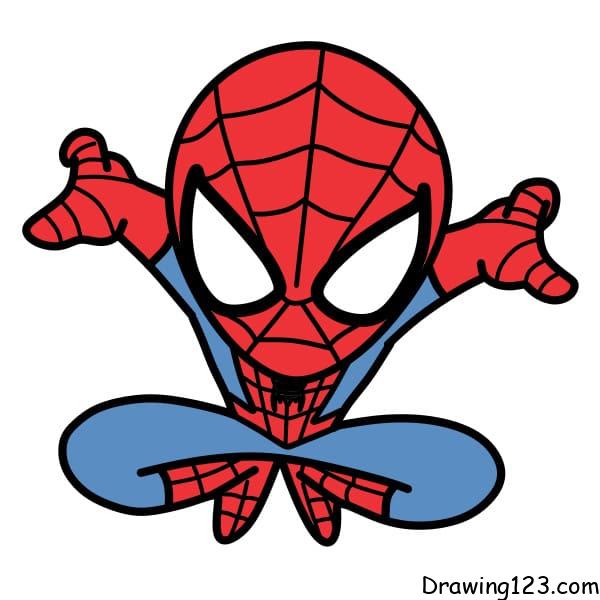
Credit: www.drawing123.com
Starting With A Basic Sketch
Spider-Man is one of the most iconic comic book characters of all time, and learning how to draw Spider-Man is a great way to hone your artistic skills. In this tutorial, we’ll go over the basics of drawing Spider-Man, starting with a basic sketch. By the end of this tutorial, you’ll be able to draw your very own Spider-Man!
Proportions And Poses
The first step in drawing Spider-Man is to get a feel for his proportions and poses. Spider-Man has a very distinct look, with a lean and muscular build that is instantly recognizable. To get started, it’s a good idea to study some reference images of Spider-Man to get a sense of his proportions and poses.
When drawing Spider-Man, pay attention to his proportions. His head should be about one-eighth the size of his body, and his limbs should be long and lean. Spider-Man also has a very dynamic posture, with his body often contorted in mid-air poses.
Mapping Out The Body
Once you have a sense of Spider-Man’s proportions and poses, it’s time to start mapping out his body. Begin by drawing a basic stick figure to outline Spider-Man’s pose and proportions. This will help you get a sense of how the body is positioned and how the limbs are oriented.
Next, start fleshing out the body by adding basic shapes to represent the muscles and contours of Spider-Man’s body. Use simple shapes like circles and rectangles to block out the major forms of the body, then refine them as you go along.
As you add details to the body, pay attention to the different textures and materials of Spider-Man’s suit. His suit is made up of a series of interlocking red and blue panels, with black webbing patterns covering the entire surface. Use thin lines to draw the webbing pattern, and add shading to give the suit a sense of depth.
By following these steps, you should now have a basic sketch of Spider-Man that you can refine and build upon. With practice, you’ll be able to draw Spider-Man in a variety of dynamic poses and positions, bringing this iconic character to life on the page.
Drawing The Head And Mask
When it comes to drawing Spider-Man, one of the most crucial aspects is capturing the essence of his iconic head and mask. This guide will take you through the step-by-step process of drawing the head and mask, focusing on the eyes and web patterns, as well as adding details and shadows to bring your drawing to life.
Eyes And Web Patterns
Spider-Man’s eyes are a key feature that sets him apart from other superheroes. Start by drawing two oval shapes for the eyes, making sure they are evenly spaced and proportionate to the size of the head. Remember to leave a small gap in the middle for the nose.
Once you have the basic eye shapes, you can add the web patterns that adorn Spider-Man’s mask. Use curved lines to create the web-like design, starting from the outer corners of the eyes and extending towards the edges of the mask. These lines should intersect and crisscross, giving the appearance of a complex web pattern.
Adding Details And Shadows
Now that you have the foundation of the head and mask, it’s time to add some details and shadows to make your drawing more realistic. Start by adding the outline of the face, following the shape of the head. Pay attention to the jawline and cheekbones, as these details will enhance the likeness of Spider-Man.
Next, focus on the mask and its texture. Use short, curved lines to create the impression of fabric folds and wrinkles. This will give your drawing a sense of depth and dimension. Additionally, you can add shading to the mask to create shadows and make it appear more three-dimensional.
Don’t forget to add the webbing pattern to the rest of the mask, extending it from the eyes to cover the entire face. This intricate pattern is a signature element of Spider-Man’s costume and will add authenticity to your drawing.
Finally, add shading and highlights to the eyes to make them stand out. Darken the areas around the eyes to create depth, and add small highlights to the upper portion of each eye to mimic the reflection of light.
By following these steps and paying attention to the details, you’ll be able to draw Spider-Man’s head and mask with accuracy and precision. Practice makes perfect, so don’t be afraid to experiment and refine your technique until you achieve the desired result.
Crafting The Torso
Learn how to draw Spider-Man by mastering the art of crafting the torso. Achieve the iconic look with these simple techniques for capturing the superhero’s dynamic physique.
Drawing Spider-Man’s torso can be a bit tricky, but with a few techniques, you can master it in no time. The torso is the foundation of the character’s body, so it’s essential to get it right. In this guide, we’ll cover the musculature and suit texture, as well as the Spider Emblem, to help you create a realistic and dynamic Spider-Man.
Musculature And Suit Texture
Spider-Man’s suit is tight-fitting, which means it’s essential to capture the musculature and suit texture correctly. Start by sketching the outline of the torso, then add the muscles. Spider-Man’s muscles are well-defined, so pay attention to the details. Once you have the muscles in place, add the suit texture. The suit has a distinctive web pattern, so make sure to include it in your drawing. Use light and dark shading to create depth and add realism to the suit texture.
The Spider Emblem
The Spider Emblem is the most recognizable part of Spider-Man’s suit, so it’s essential to get it right. Start by sketching the spider shape in the middle of the chest. The spider has eight legs, so make sure to include them all. Once you have the spider shape, add the webbing. The webbing extends from the spider’s body and covers the torso. Use thin and thick lines to create the webbing effect.
Finally, shade the emblem to create depth and make it stand out. In conclusion, crafting Spider-Man’s torso requires attention to detail and practice. By following these tips, you can create a realistic and dynamic Spider-Man that will impress your friends and family. Remember to pay attention to the musculature and suit texture, as well as the Spider Emblem, to create a complete and accurate representation of the character.
The Limbs And Action
When drawing Spider-Man, the limbs and action are crucial elements that bring the character to life. Understanding how to depict dynamic arms and legs, as well as creating movement, is essential for capturing the essence of this iconic superhero.
Dynamic Arms And Legs
Spider-Man is known for his dynamic and acrobatic movements. To convey this, focus on drawing bold, exaggerated lines for his arms and legs. Emphasize the muscles and tension in his limbs to reflect the character’s agility and strength. Utilize long, fluid lines to depict the graceful movement of his arms and legs as he swings through the city.
Creating Movement
Spider-Man’s movements are all about fluidity and action. Incorporate a sense of motion into your drawings by experimenting with different poses and stances. Consider drawing Spider-Man in mid-air, with his arms extended and legs bent, to convey a sense of propulsion and energy. Capture the sensation of speed and agility through the positioning of his limbs and the flow of his costume.
Webbing And Accessories
When it comes to drawing Spider-Man, it’s essential to pay attention to the webbing and accessories that make the character iconic. From the intricate spider-web design to the utility belt and gadgets, these elements add depth and detail to your artwork. In this section, we will explore each aspect and provide tips on how to draw them accurately.
Spider-web Design
The spider-web design is a crucial part of Spider-Man’s costume. It symbolizes his ability to swing from buildings and capture villains. To draw the spider-web pattern, start by sketching a small circle in the center of the chest area. From this circle, extend curved lines outward, creating a web-like pattern. Connect these lines with smaller curved lines to complete the webbing. Remember to vary the thickness of the lines to add depth to your drawing.
Utility Belt And Gadgets
Spider-Man’s utility belt is another important component of his outfit. It holds various gadgets and tools that aid him in his crime-fighting adventures. To draw the utility belt, begin by sketching a horizontal line across Spider-Man’s waist. Add rectangular shapes along this line to represent compartments. Within these compartments, you can draw small tools like web-shooters and trackers. Don’t forget to include details such as buttons and straps to make the belt appear realistic.
In addition to the utility belt, Spider-Man also has an array of gadgets that assist him in his battles against villains. These gadgets include web-shooters, spider-tracers, and spider-signal devices. When drawing these accessories, pay attention to their placement and size. The web-shooters, for example, are usually depicted on Spider-Man’s wrists. Draw them as small, cylindrical devices with intricate details.
Remember, practice makes perfect. Don’t be discouraged if your first attempts at drawing Spider-Man’s webbing and accessories don’t turn out exactly how you envisioned. With time and persistence, you will improve your skills and create captivating illustrations of everyone’s favorite web-slinger.
Inking And Final Touches
Once the sketch is complete, it’s time to add bold lines and shading to give Spider-Man depth.
Bold Lines And Shading
Use a black pen to trace over the pencil lines with bold strokes.
Add shading to create dimension by darkening areas that would be in shadow.
Refining The Illustration
After inking, erase any remaining pencil marks for a clean look.
Use a fine tip pen for details like web lines and facial features.
Adding Color To Spider-man
Coloring Spider-Man can bring the character to life in a vibrant and dynamic way. Adding color to Spider-Man involves choosing the right palette, creating shadows, and highlighting key features to make the drawing pop.
Choosing The Right Palette
Spider-Man’s iconic colors are red and blue. Consider using vibrant shades to make the drawing stand out. Primary colors are essential for capturing the essence of Spider-Man.
Shadows And Highlights
Shading adds depth to Spider-Man. Use darker tones for shadows and lighter tones for highlights to create a three-dimensional effect. Experiment with different shades to enhance the overall look.
Background And Setting
Background and Setting: When drawing Spider-Man, it’s essential to capture the dynamic cityscapes and perspectives that define his world. Integrating Spider-Man seamlessly into the scene brings the character to life.
Cityscapes And Perspectives:
Cityscapes are crucial in Spider-Man drawings; they set the stage for his heroic adventures.
- Include iconic NYC landmarks like skyscrapers and bridges.
- Emphasize depth and scale to showcase Spider-Man’s urban playground.
Integrating Spider-man Into The Scene:
Spider-Man should interact with the environment to enhance the storytelling.
- Place Spider-Man in action poses like swinging from buildings.
- Ensure his proportions match the perspective of the cityscape.
Common Mistakes To Avoid
When drawing Spider Man, it’s essential to steer clear of common errors that can detract from the overall quality of your artwork. By being mindful of these mistakes, you can ensure a more accurate and visually appealing representation of this iconic superhero.
Proportion Errors
- Avoid disproportionate body parts.
- Ensure Spider Man’s head, torso, and limbs are correctly sized.
- Check proportions by comparing the size of different body parts.
Overcomplicating The Webbing
- Keep the webbing design simple and consistent.
- Avoid overcrowding the suit with excessive web patterns.
- Focus on clean lines and spacing for a polished look.
Practice Makes Perfect
Drawing Spider Man can be a challenging task, but with practice, you can master the art of bringing this iconic superhero to life on paper. Whether you are a beginner or have some experience in drawing, the key to improving your skills lies in consistent practice. By dedicating time and effort to honing your drawing abilities, you can gradually develop the techniques and confidence needed to create impressive Spider Man illustrations.
Drawing Different Poses
To truly capture the essence of Spider Man, it is important to explore drawing him in various poses. This will not only enhance your understanding of his dynamic movements but also allow you to experiment with different angles and perspectives. Start by sketching Spider Man in classic poses, such as the iconic web-slinging stance or crouched on a building ledge. Once you feel comfortable with these, challenge yourself by attempting more complex poses, like mid-air acrobatics or fighting scenes. Remember, each pose presents a unique opportunity to showcase Spider Man’s agility and strength.
Seeking Feedback And Improvement
While practicing alone can help you improve, seeking feedback from others can provide valuable insights and help you refine your drawing skills. Share your Spider Man drawings with fellow artists, join online art communities, or take part in local art groups. Constructive criticism and suggestions can help you identify areas for improvement and guide you towards achieving more accurate and detailed illustrations. Embrace feedback as a tool for growth and use it to enhance your understanding of Spider Man’s anatomy, proportions, and overall aesthetics.
Remember, practice is the key to mastering any skill, including the art of drawing Spider Man. By consistently challenging yourself to draw Spider Man in different poses and seeking feedback for improvement, you can gradually enhance your abilities and create captivating illustrations that truly capture the essence of this beloved superhero.
Frequently Asked Questions
How Can I Learn To Draw Spider Man?
You can learn to draw Spider Man by studying his iconic poses, practicing basic human anatomy, and mastering the details of his costume. Many online tutorials and drawing books are available to help you improve your skills and capture Spider Man’s dynamic appearance.
What Are Some Essential Tips For Drawing Spider Man?
When drawing Spider Man, focus on capturing his agility and strength through dynamic poses and expressive facial expressions. Pay attention to the details of his costume, such as the web patterns and the fluidity of his movements. Practice regularly to enhance your skills and creativity.
Are There Specific Tools For Drawing Spider Man?
To draw Spider Man effectively, use high-quality pencils, pens, and markers to outline and add details to your artwork. Additionally, consider using references from comic books, movies, or official Spider Man artwork to ensure accuracy and authenticity in your drawings.
Experiment with different tools to find what works best for you.
Conclusion
Mastering the art of drawing Spider-Man takes practice and patience. By following the step-by-step guide and honing your skills, you can bring this iconic superhero to life on paper. Embrace your creativity and enjoy the process of learning to capture the essence of Spider-Man through your artwork.